|
The following will detail the
conversion/restoration of this cabinet.
BACK
|
|
 |

PERCENT COMPLETE |
|
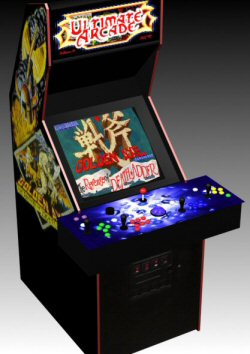
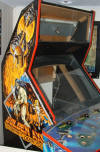
Here is the cabinet I
probably will keep for myself (at least for a little while)
:) It's great, it's not a super-duper classic, it's
already been converted and kind of butchered, so I'm going
to make a mame cab out of it, but hopefully a tasteful and
reversible one.
Let's get started!! |

Well at first look, this is a
nice conversion. I guess in all fairness it is... I
might leave the graphics on the side of this panel intact,
but likely not, since it won't match with the sideart or the
graphics I intend to do for the underlay and marquee.
|
 |
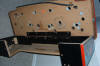
| Not too much
destruction under here. I was prepared to replace the
whole panel, but it looks like it will work. |
 |
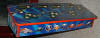
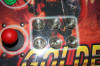
| What panel
is complete without masses of cigarette burns around the
player start buttons. I'm measuring this panel now and
plunking the dimensions into CAD so that I can plan out a
useable panel.
|
 |
| |
|
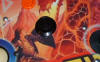
| The sideart
is nicked and scuffed and drilled, but looks so damn nice
there's no way I'm removing it! Besides, it looks MUCH
better than just black, and again, if someone wanted to turn
it back into a Golden Axe 2, it wouldn't take too much! |
 |
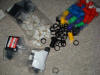
| I Pile o'
parts showed up. Happ buttons and super joysticks for
the 2 player setup. I still need to order the trackball and the interface card. |
 |
|
|
|
|
|
|
|
I cut a
new piece of plexi for the panel. I used fairly thick
plexi this time so that it will take a real beating. |
 |
|
|
|
|
|
|
|
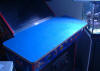
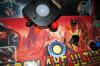
The new underlay
graphic is printed! Now I need to place the controls.
I'm glad I decided on a more Golden-axe themed panel (thanks
to some input from the BYOAC'ers thanks guys!) |
 |
|
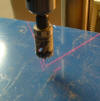
Got a new drill press, so
things should speed right along. Look at the reach on
this thing, and the coolio laser system. This will
help my productivity and my accuracy tenfold, since I don't
have to line my drill points up by eye, and I can do a lot
of holes that my old press couldn't reach. I had to
take some of the plugs I made drilling out the new holes and
glue them into some of the holes that were already there,
for strength. There were a lot of holes! |
 |
|
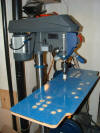
Here is the drilled
panel. Hole for the trackball is missing, but I want
to wait till it shows up. Coming along nicely now!! |
 |
|
Stripped right down, and
now I'm filling the scrapes and gouges with extra strength
wood filler. I'll sand it all smooth, mask the sideart
and give it a new spray coating to make her look as good as
new. Ultimarc interface and trackball is on the way, and I'll
have to make an order to t-molding.com |
 |
|
Trial run with the
controls. Protective plastic still on the plexi, but
the panel looks like it will work! |
 |
|
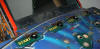
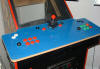
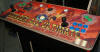
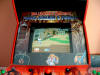
Controls installed...well
minus the Votex spinner. No worries that will be on
there when I install the Pinmame flipper buttons. I
don't know if you can make it out in the pic, but I put a
nice bevel in the overlay around the trackball, to make it
much less likely fingers will get scraped, plus it looks
good! |
 |
|
|
|
|
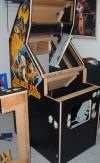
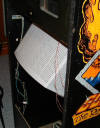
That monitor is huge!
Even though a 25" monitor was in here when it was in the
arcade, the 21" computer monitor pokes way out the back!
It's held in place by a single piece of stock steel that I
measured, bent and drilled. It's strong enough to hold
it in place even when moving it around. The back won't
fit on, but it won't matter when it's against the wall. |
 |
|
|
|
|
|
|
|
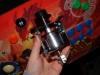
Oh boy! Vortex "V2"
installation! In order on the right: Installation spot
on the panel, the V2 with push feature, the single hole
drilled and spinner shaft installed, and finally the knob
attached. The whole procedure took only about 10
minutes to do. Plug it into the minipac and go! |
1.
2.
3.
4. |


|
|
|
|
|
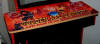
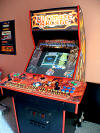
It took me AGES to get
the bezel art done for this. Now I have a complete
cabinet. Hard to believe this one moved houses before
it was completely functional! Now it plays visual pinball,
future pinball, Mame, Daphne and 100+ gigs of mp3 files.
The 21" monitor looks almost tiny in there, but it does the
job. The kids play it all the time, in fact a lot more
than I would have expected, so I'm pleased with the outcome! |
 |
|
|
|
|
One final shot of the
bezel. It was some kind of desktop wallpaper, and I just
resized and added an instruction card and a title. |
 |
|
|
|
|
UPDATE!!!! NEW
IMPROVEMENTS! |
|
The 21" monitor started
to turn a bit nasty- a lot of horizontal lines, and a
bleached look. Instead of messing with it, I decided
to put in a new LCD. Now the back fits on the cabinet
easily. |
 |
|
|
|
|
I grabbed some Groovy
Game Gear lighted buttons, and one of the new LED wiz
controllers. I've got the buttons set in place, but I
can't hook it up until I finish the next step... |
 |
|
|
|
|
I also grabbed a 3"
lighted trackball. The ultimarc trackball was too
small for the surface, and honestly it didn't stand up well
to even moderate use. I grabbed the multi-colour
module at the same time and a mounting plate. Here you
can see the old one and the new one. |
 |
|
|
|
|
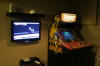
The cabinet still gets a
lot of use, we placed it next to the dedicated wii setup,
and it proves perfect for parties. It just needed more
bling! (and a trackball that doesn't kill my wrist!) |
 |
|
|
|
|
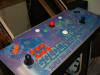
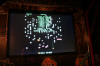
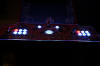
Here, we go, the lighted
buttons, and the trackball. It works perfectly, and I
polished the edges of the plexi. Pretty good effect! |
 |
|
|
|
|
|
|


