The following will detail the
conversion/restoration of this cabinet.
BACK
|
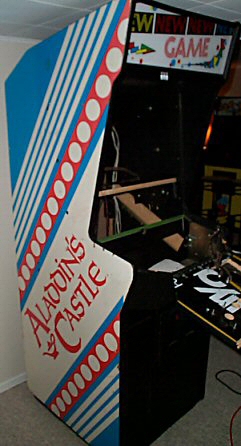
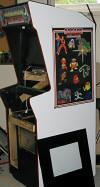
Okay, We're doing
a two player panel here with all the trimmings! This one
is going to have a panel for accessing the computer (seen to the
left), a slide out keyboard drawer and a full subwoofer system.
First to smooth the sides and get a good proper finish on this.
Monitor shelf is going to need to move to hold a 20" monitor...
and hopefully it will fit in the cab! |
|
|
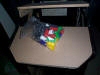 |
New board, some controls, let's turn this
into a game machine! |
|
|
 |
Getting an idea where things will go and not
get in the way of each other. I'm going to pick up some
plexi for this tomorrow, putty the nicks and scratches on the
cabinet, and start the planning for the artwork. When the
plexi is cut I'll drill the buttons and router out the joystick,
spinner and trackball areas. Then it's a matter printing
the artwork and wiring this puppy up! |
|
| |
 |
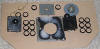
Okay, I've got everything
routed here, and you can see the plexi and the trackball
mounting plate. A bit of primer and a hole for
the trackball in the plexi, and we're on our way! |
|
|
| |
|
|
|
|
| |
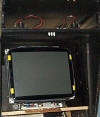 |
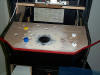
The upper speakers and monitor are in place.
I managed to fit only a 19" monitor in there, but with the
casing off it should work out well, so it looks like the new
client gets a bit of a break on the quoted price :) Full
volume controls are right above the monitor. |
|
|
| |
|
|
|
|
| |
 |
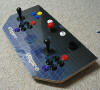
The panel is drilled,
filled, sanded and fitted. Now for a primer coat and to apply
the plexi. Photo on right shows the plexi in place missing
the trackball and spinner hole. It fits! |
 |
|
| |
|
|
|
|
| |
 |
Oh man that marquee looks
good in there, the lighting does it justice! |
|
|
| |
|
|
|
|
| |
 |
I am still awaiting word on
what color the sides will be, but here is the machine as I start
to put the final pieces together. I will drill the spot
for the spinner today, and then assemble the panel, then the
computer will be mounted into place behind the access panel,
then I just need to do some wiring, install the new t-molding
and work on the black monitor bezel, and get the sideart done.
Oh, and the keyboard drawer, which will be tricky, but a
challenge.
|
|
|
| |
 |
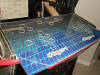
Here's the sideart and the
new red t-molding. I had the sideart prints laminated, and
will attach them to the sides with spray adhesive, once I figure
out the proper place for them. Again, I used Kinko's for
the sideart prints, at a cost of about $120 for the two prints.
|
|
|
| |
 |
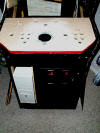
To the left is the panel
dry-fitted, and to the right is the panel installed on the base
(detached from the cabinet in order to install a flip down
keyboard tray) See, told ya it would look nice! |
 |
|
| |
|
|
|
|
| |
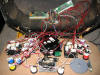 |
A nice collection of wires! The Ipac is
wired, and work on the opti-pac is started. I never get
the colors right on the trackball wiring, so I know I'll be
swapping the things till the cursor goes where it's supposed to,
but the spinner always wires up quick and easy. |
|
|
| |
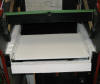 |
Here is a shot of the under panel keyboard
drawer. This took a little time to get right, since I
couldn't just cut too much material away from the front of the
cab, or it might snap on moving. As it is, it just fits,
and slides nicely. Once the primer dries I'll hit it with
a coat of black and it will be near invisible to the casual
observer. The drawer rails I got from a kit at Home Depot, and
the drawer itself is a thin sheet of particleboard. |
|
|
| |
 |
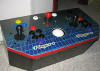
Here the bezel glass is in place,
and the controller is done. I just have to finish the
computer, can do a little work on the inner bezel, and it's
done! Lets get some power into this monster |
|
|
| |
 |
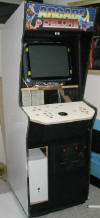
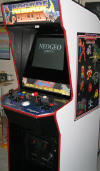
The sides are done in a light grey at the new
owner's request, so that it shows up well where it's going to be
placed. The sideart turned out well, and went on without a
hitch with the industrial spray adhesive. The laminate
material keeps the adhesive from bleeding into the inks, and
makes for a nice durable finish. Should stand up to a bit
of punishment. The computer is built and running great, so
next should be some shots of it up and running! |
|
|
| |
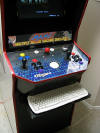 |
I got a couple of requests to see the
"hidden" keyboard drawer. Here it is with the Logitech
keyboard in place...it fit to within a millimeter! |
|
|
| |
 |
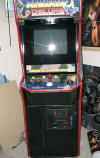
Taaaa Daaaa! Another beauty (if I do
say so myself, and since I have no sense of modesty, I DO!) :)
Now on to the Virtua Mame Cab!! |
|
|
|